Overview
Before you invite instructors or enroll students, it's important to lay the groundwork. The school setup process in NimbusLearn lets you define your institution's identity, academic calendar, and grading policies. Completing these steps first ensures that every user who joins later inherits the correct settings automatically.
This guide walks you through each configuration area in the order we recommend. Most administrators complete the full setup in under 20 minutes.
Step 1: Logging In for the First Time
When your NimbusLearn instance is provisioned, the primary administrator receives a welcome email containing a temporary sign-in link. This link is valid for 72 hours.
- Open the welcome email from no-reply@nimbuslearn.com and click Activate Your Account.
- You'll be taken to the password creation screen. Choose a strong password (at least 6 characters).
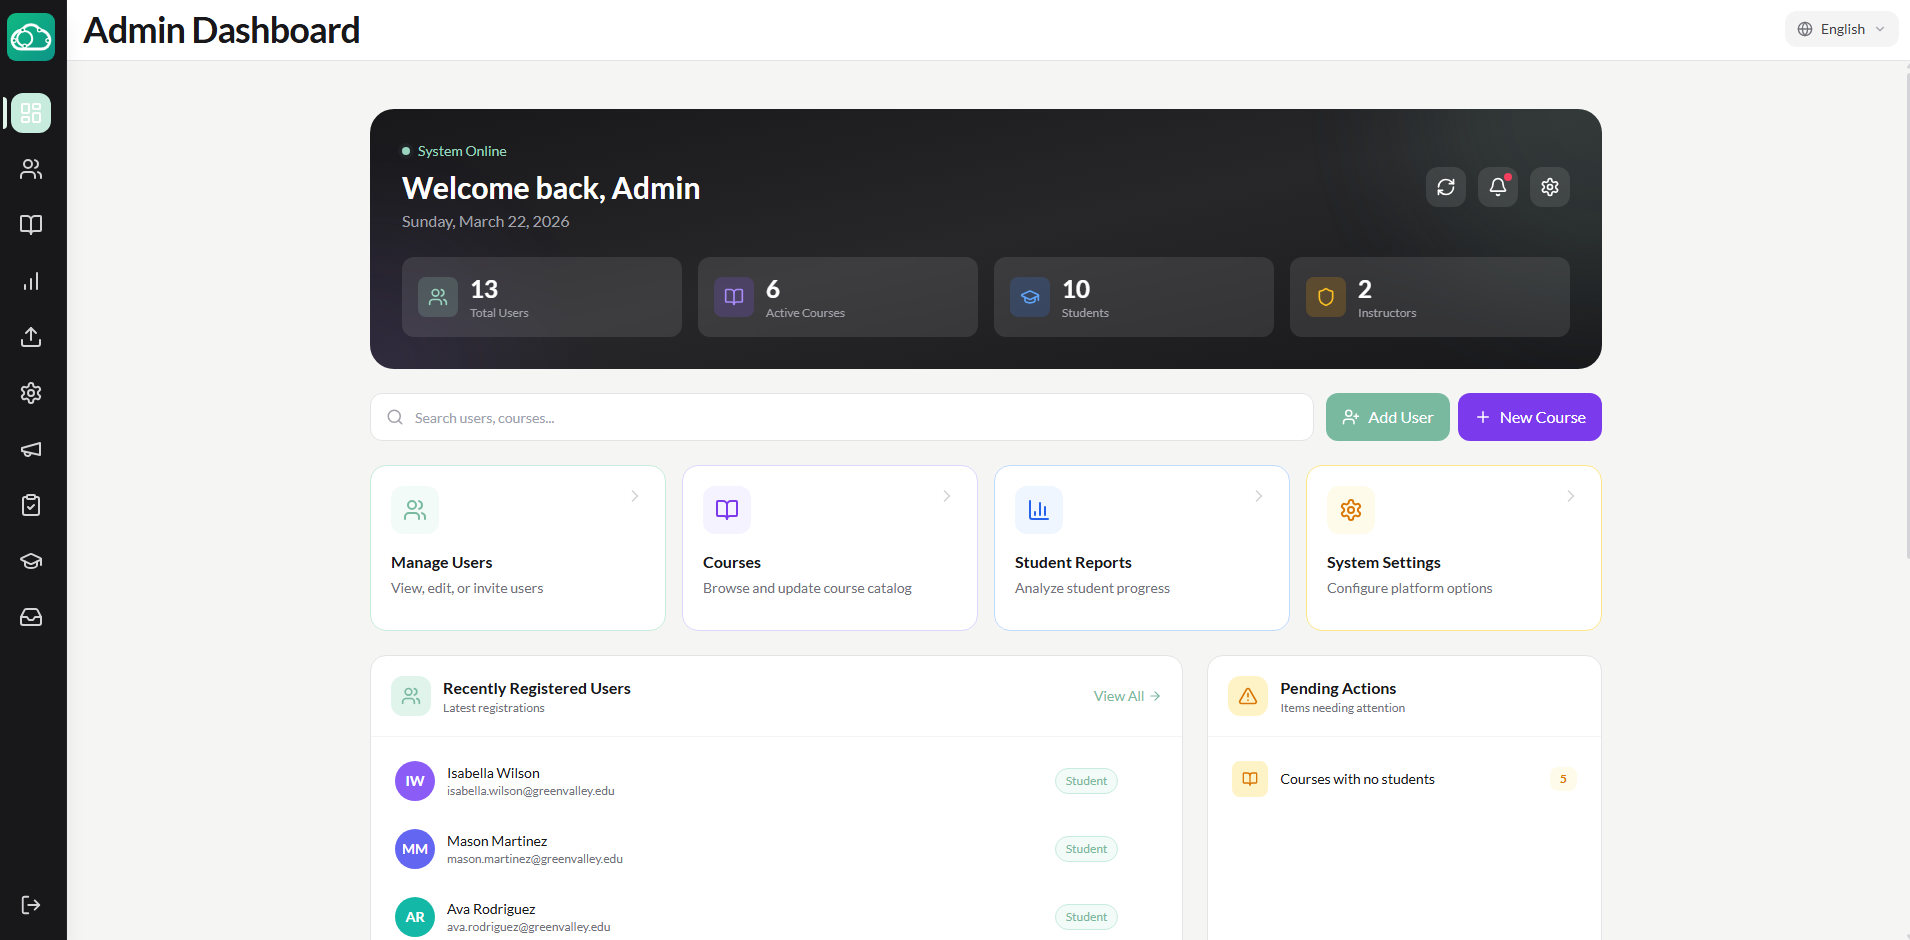
- Once authenticated, you'll land on the Admin Dashboard, which shows an overview of your school — total students, active courses, and recent activity.
If your welcome email has expired, contact NimbusLearn support at support@nimbuslearn.com to request a new activation link.
Step 2: Setting Up Your School Profile
Your school profile is the identity of your institution within NimbusLearn. It appears on the login screen and throughout the platform.
- From the Admin Dashboard, navigate to Settings and open the School tab.
- Fill in the following fields:
- School Name — The full official name of your institution (e.g., "Greenwood International Academy").
- Address — The physical address of your institution.
- Logo — Upload your school's logo (PNG or SVG). This appears on the login page and in the header.
- Primary Color and Secondary Color — Customize the platform's branding to match your school's colors.
- Click Save at the bottom of the page.
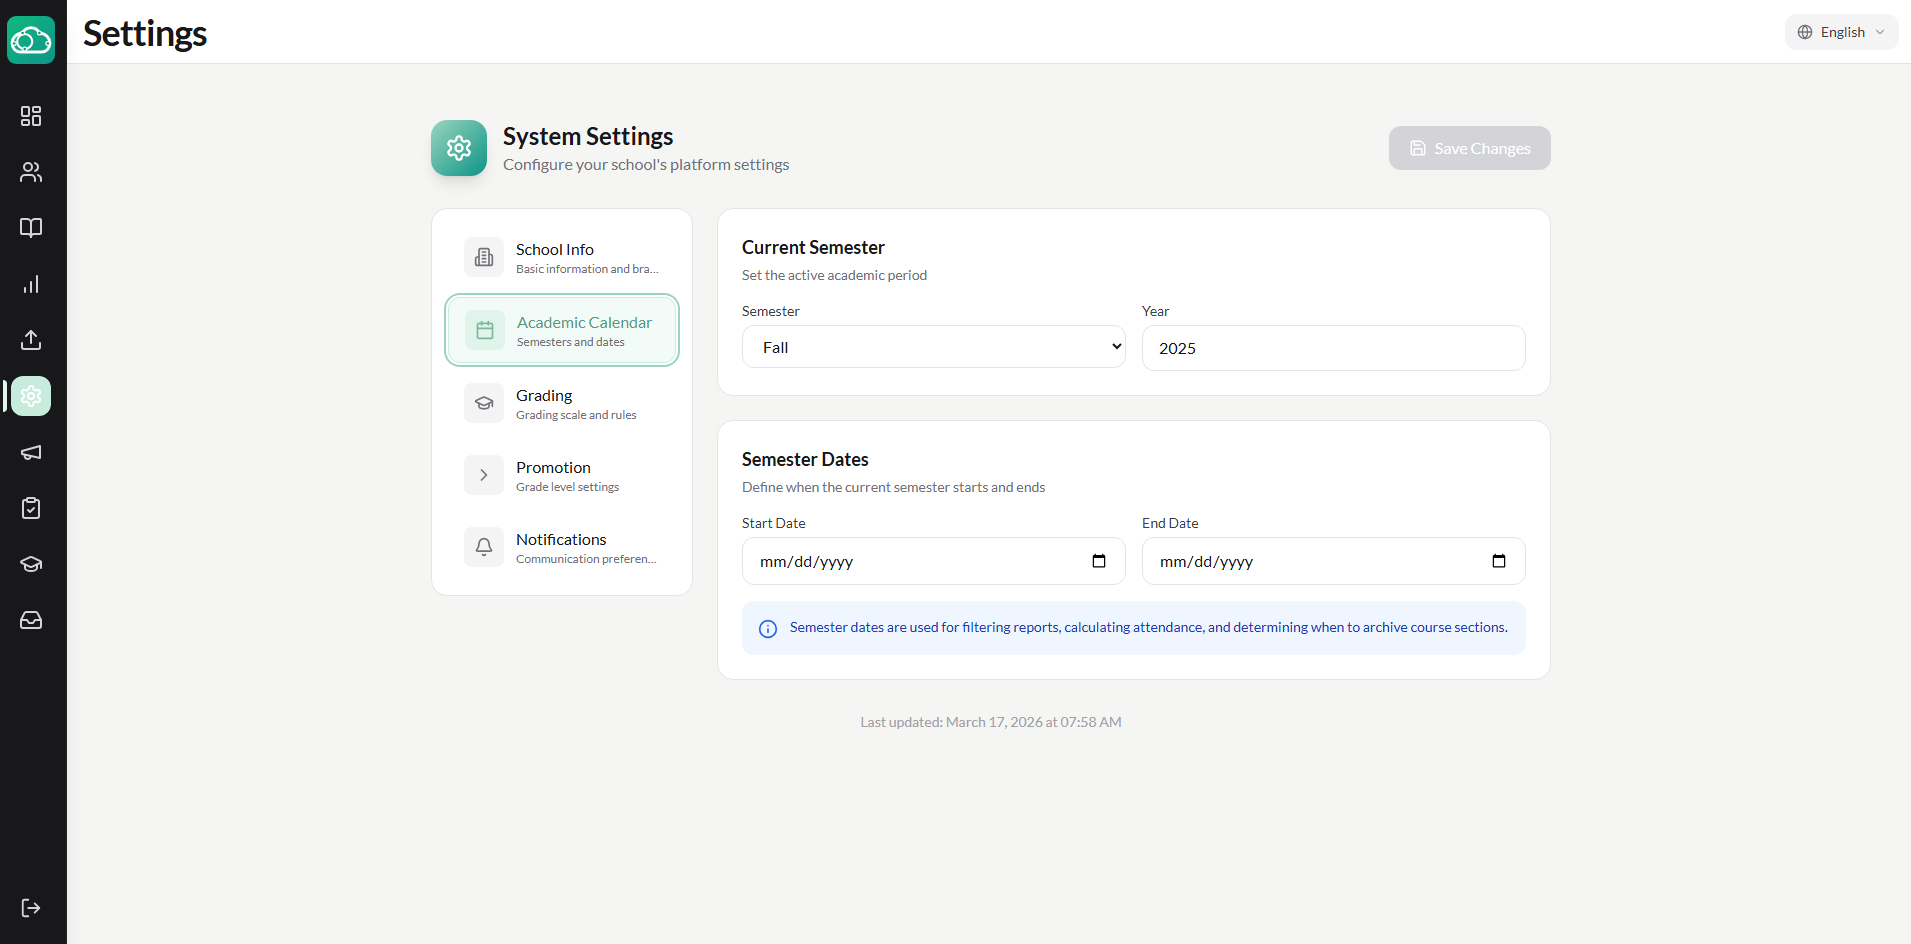
Step 3: Configuring the Academic Calendar
The academic calendar defines your current term and dates. All courses and grades are tied to the active term.
- Go to Settings and open the Academic tab.
- Set the following fields:
- Current Semester — The name of the active term (e.g., "Fall" or "Semester 1").
- Current Year — The academic year (e.g., "2026–2027").
- Semester Start Date and Semester End Date — The boundaries of the current term. These dates are used throughout the system for course scheduling and reporting.
- Click Save to apply your changes.
Step 4: Configuring the Grading Scale
The grading scale determines how percentage scores map to letter grades across your school.
- Go to Settings and open the Grading tab.
- Configure your grading scale by setting the minimum percentage threshold for each letter grade. For example:
- A = 90%, B = 80%, C = 70%, D = 60%, F = 0%
- Set the Default Passing Grade — the minimum percentage required to pass a course (e.g., 60%).
- Toggle Show Letter Grades and Show GPA to control how grades are displayed to students and on reports.
- If GPA is enabled, set the GPA Scale (typically 4.0 or 5.0).
- Optionally, enable Attendance Affects Grade and set the attendance weight as a percentage of the final grade.
- Click Save.
Step 5: Promotion Settings
Promotion settings control how students advance between grade levels at the end of a term.
- Go to Settings and open the Promotion tab.
- Set the minimum and maximum grade levels your school supports (e.g., Grade 1 through Grade 12).
- Choose whether to auto-archive enrollments when students are promoted.
- Enable Require Grade Approval if you want administrators to review and approve final grades before promotion.
- Set the graduating action — what happens to students who complete the maximum grade level. Options include keeping their account active, deactivating it, or marking them as alumni.
- Click Save.
Step 6: Notification Settings
Control how NimbusLearn communicates with your users.
- Go to Settings and open the Notifications tab.
- Toggle Email Notifications on or off. When enabled, users receive email alerts for important events like new announcements and grade updates.
- Toggle SMS Notifications on or off for text message alerts.
- Click Save.
Step 7: Setting Up School-Wide Announcements
Announcements are the primary broadcast communication channel in NimbusLearn. They appear on the dashboard of every user who matches the target audience.
- From the Admin Dashboard, click Announcements in the sidebar.
- Click + New Announcement.
- Fill in the announcement details:
- Title — A clear, concise subject line.
- Content — The body of your announcement.
- Audience — Choose who sees this announcement: All Users, Students Only, or Instructors Only.
- Click Publish.
Course-level announcements can also be created by instructors within individual course sections.
What's Next?
With your school profile, academic calendar, grading scale, and promotion settings in place, your NimbusLearn instance is ready for content. The next step is creating your first course — head over to the guide below to get started.