Overview
Courses are the heart of NimbusLearn. Each course contains sections taught by instructors, where you organize learning materials, post assignments, communicate with students, and track grades. This guide takes you from course creation to a fully structured, content-ready course section.
By the end of this walkthrough, you'll have a course with organized modules, content pages, and uploaded resources — everything you need before enrolling students.
How Courses and Sections Work
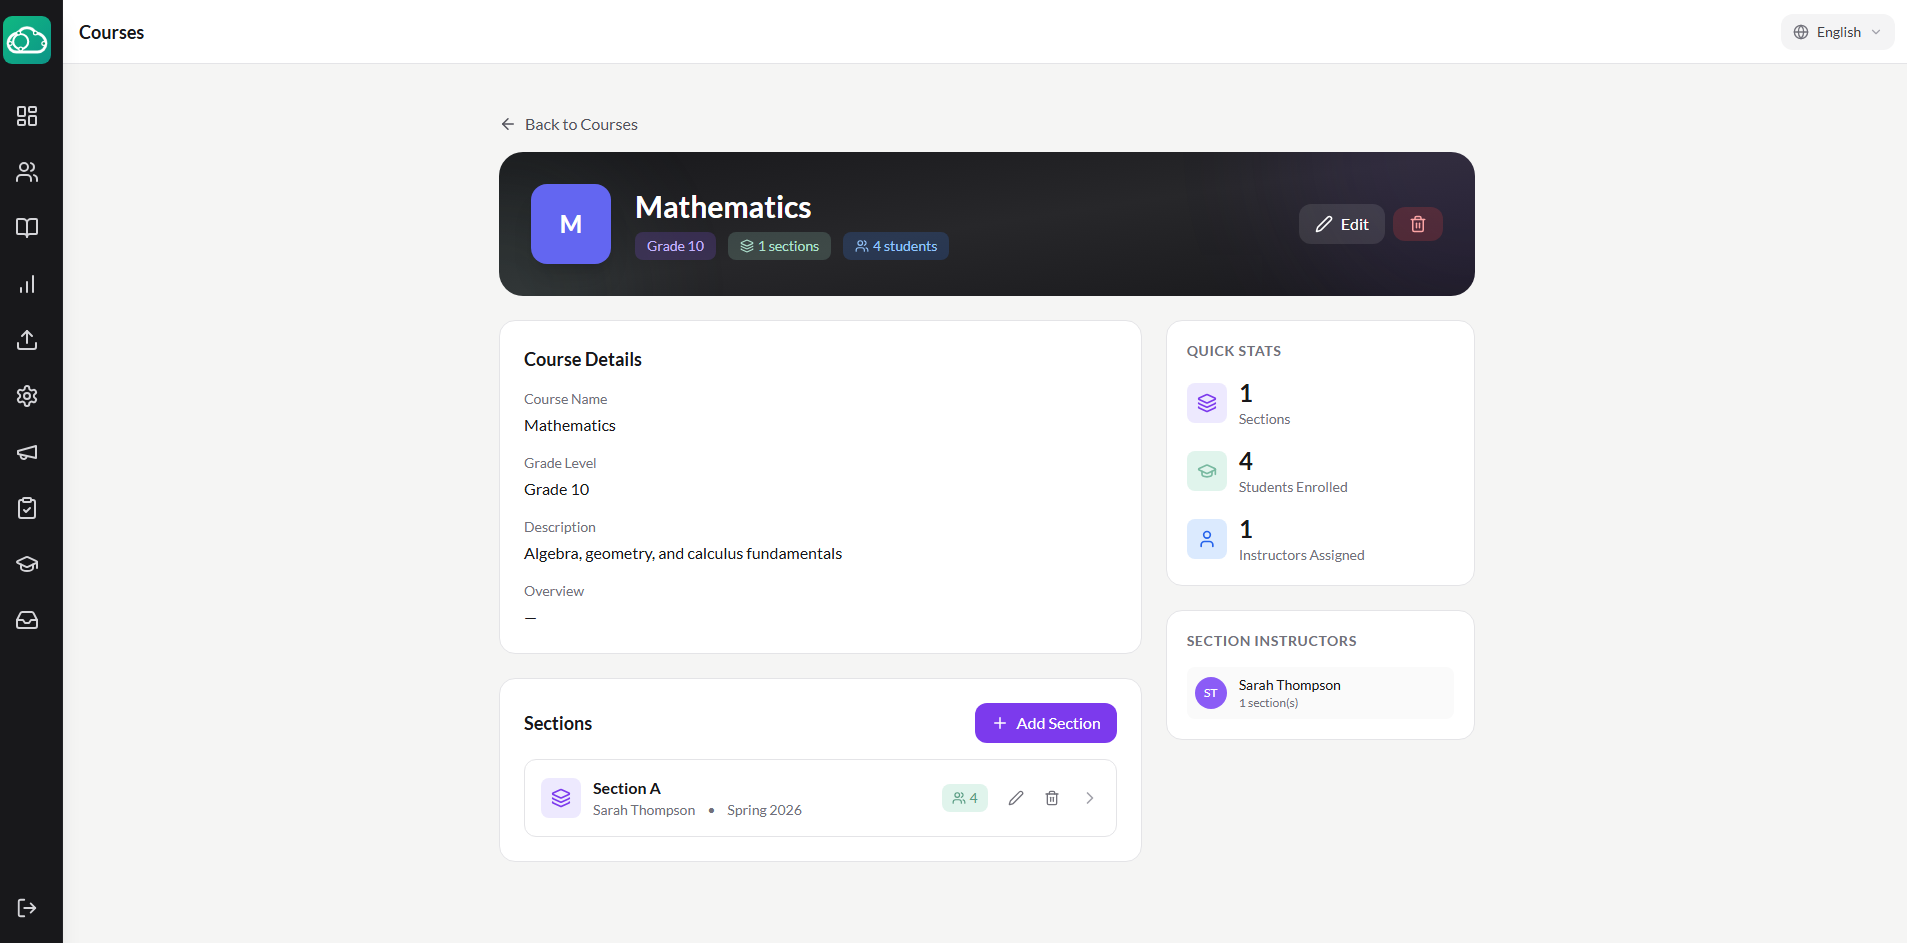
In NimbusLearn, a Course represents a subject (e.g., "Biology"), and Sections are the individual classes within that course (e.g., "Biology – Section A" taught by Mr. Ahmed). Sections are where all the action happens: each section has its own instructor, enrolled students, modules, assignments, grades, and attendance.
Admins create courses and sections from the admin panel. Instructors then manage their assigned sections.
Creating a New Course (Admin)
Admins create courses from the Admin → Courses page.
- Click + New Course.
- Fill in the course details:
- Course Name — The title of the course (e.g., "AP Biology").
- Description — A brief summary of what the course covers.
- Grade Level — The target grade level for this course.
- Click Create.
Creating Sections
After creating a course, add one or more sections to it. Each section is assigned to an instructor and has its own schedule, students, and settings.
- Open the course and click + Add Section.
- Fill in the section details:
- Section Name — e.g., "Section A" or "Period 3."
- Instructor — Assign the instructor for this section.
- Semester and Year — The academic term this section belongs to.
- Start Date and End Date — When the section runs.
- Zoom Link (optional) — A link to the section's virtual meeting room.
- Click Create Section.
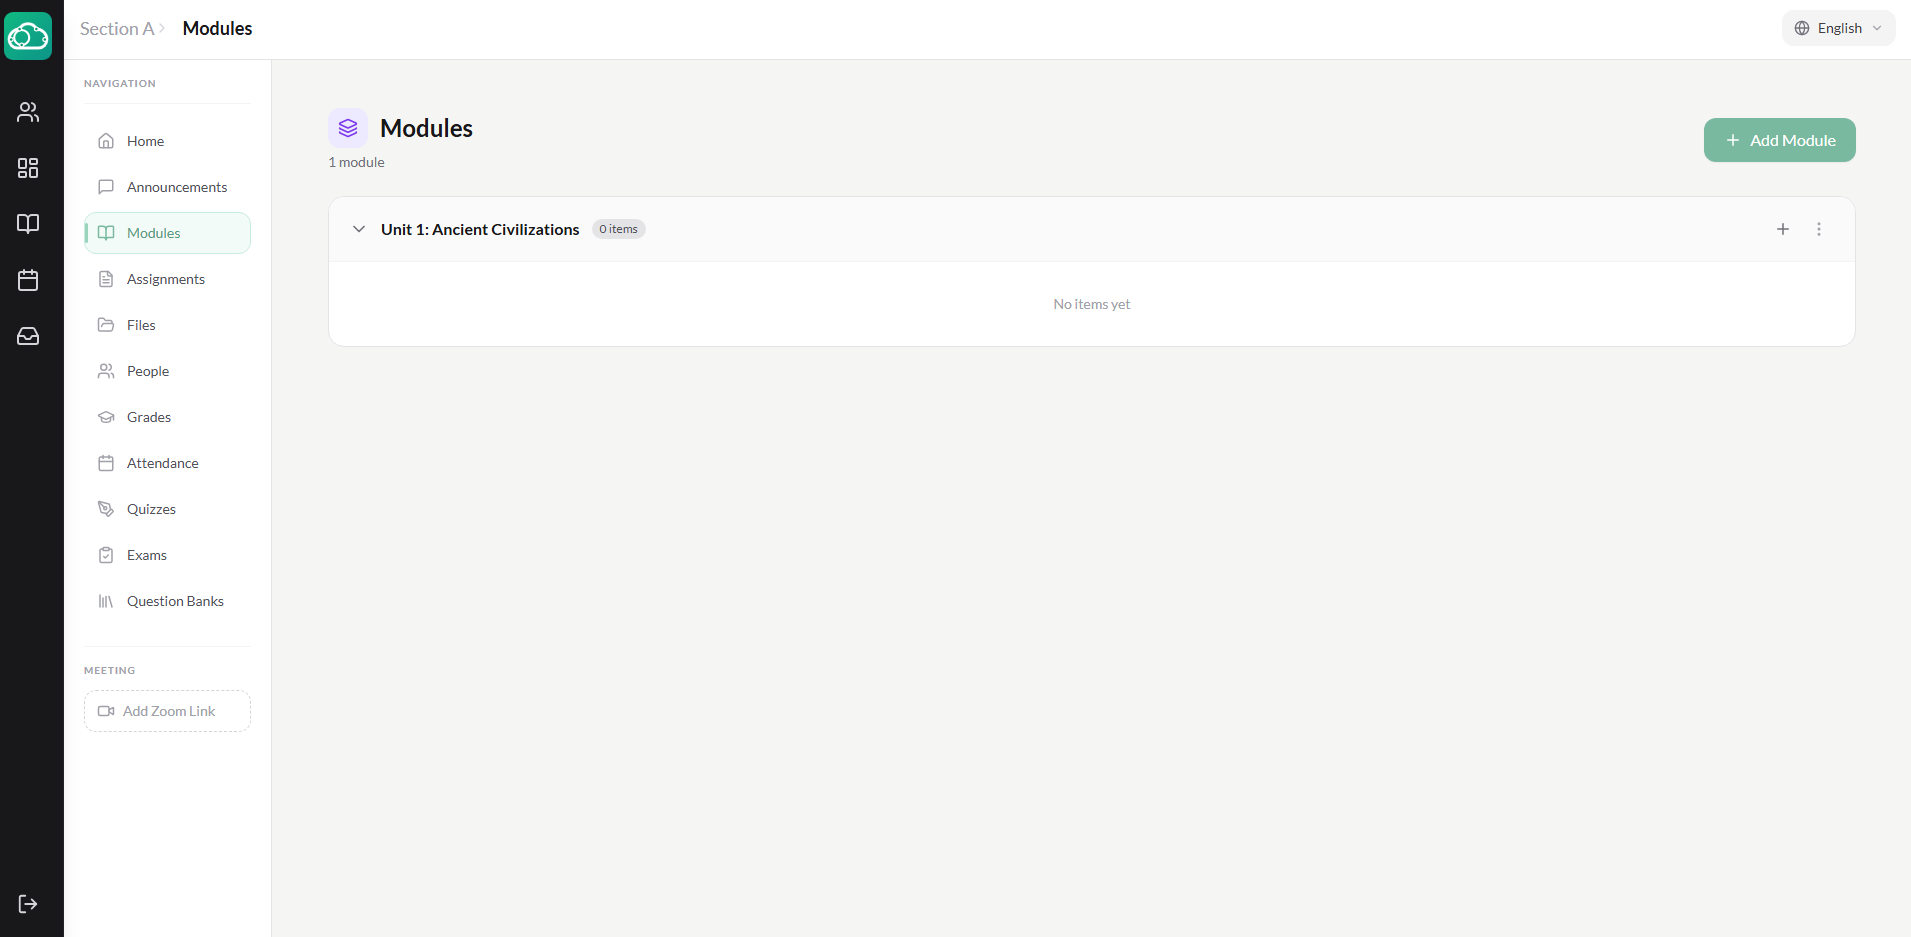
Understanding the Section Home Page
When an instructor opens one of their sections, they see the section home page with navigation to all content areas:
- Home — Section overview with the course description and quick links.
- Modules — Organized content units containing pages, assignments, quizzes, exams, and files.
- Assignments — All assignments for this section.
- Quizzes / Exams — Assessments for this section.
- Grades — The gradebook for enrolled students.
- Attendance — Daily attendance tracking.
- Announcements — Section-level announcements.
- Files — Uploaded course resources.
- People — Enrolled students and the instructor.
Adding Modules and Organizing Content
Modules are the top-level organizational containers in a section. Think of them as chapters or units. Each module can hold pages, files, assignments, quizzes, and exams.
- Click Modules in the section navigation.
- Click + Add Module. Enter a name that reflects the content unit — for example, "Module 1: Cell Structure and Function" or "Week 1: Introduction."
- Optionally, add a module description to give students context about what they'll learn.
- Click Create Module. The module appears as a collapsible section in the content area.
Repeat for each unit in your course. You can reorder modules by dragging them, and toggle their visibility with the publish/unpublish control.
Adding Items to Modules
Inside each module, click + Add Item to add content. The available item types are:
- Page — Create a content page with text, formatted using the editor. Great for lectures, reading material, and instructions.
- Assignment — Link an existing assignment or create a new one directly from the module.
- Quiz — Link an existing quiz or create one.
- Exam — Link an existing exam or create one.
- File — Upload a file (PDF, DOCX, PPTX, images, etc.) as a course resource.
Each item within a module can be individually published or unpublished, giving you control over what students can see as you build out your course.
Uploading Files and Resources
You can upload files both through modules and through the dedicated Files tab in the section navigation.
- Click Files in the section navigation, or click + Add Item → File inside a module.
- Upload your file. Supported formats include PDF, DOCX, PPTX, XLSX, images, and more.
- Give the file a descriptive title so students know what it contains.
Section Settings
Each section has its own settings that the instructor can configure:
- Late Policy — Enable late penalties and set the per-day deduction percentage and lowest possible grade.
- Attendance Grading — Toggle whether attendance counts toward the final grade, set the starting attendance score, and configure how each status (Present, Late, Absent, Excused) affects the grade.
- Zoom Link — Add a meeting link for virtual sessions.
- Archive — Archive the section when it's no longer active.
Publishing Content
You control what students can see through the publish state on modules and individual items.
- Unpublished modules are invisible to students — only the instructor can see them. This gives you time to build out content.
- Published modules with a mix of published and unpublished items let you release content gradually.
- Individual items (pages, assignments, quizzes, files) each have their own publish toggle.
What's Next?
Your course structure is in place. The next step is adding students and instructors — head to the user management guide to learn how.