Understanding the Enrollment System
In NimbusLearn, enrollment is the process of connecting students to courses. A student must be enrolled in a course to access its content, submit assignments, and receive grades. Enrollments are organized by sections — a section is a specific instance of a course taught by a particular instructor at a particular time. For example, "Math 101 – Section A (Mr. Ahmed, Period 2)" and "Math 101 – Section B (Ms. Sara, Period 3)" are two sections of the same course.
As an administrator, you have full control over who is enrolled where, and you can make changes at any point during the academic year.
Enrolling Students Individually
For quick additions — such as a new student joining mid-semester — individual enrollment is the fastest option.
- Go to Admin > Courses and select the course you want to add a student to.
- Click the Enrollments tab within the course.
- Click Add Student.
- Search for the student by name or ID number.
- Select the correct section from the dropdown.
- Click Enroll.
The student will immediately gain access to the course and all its published content. They will also receive a notification that they have been enrolled.
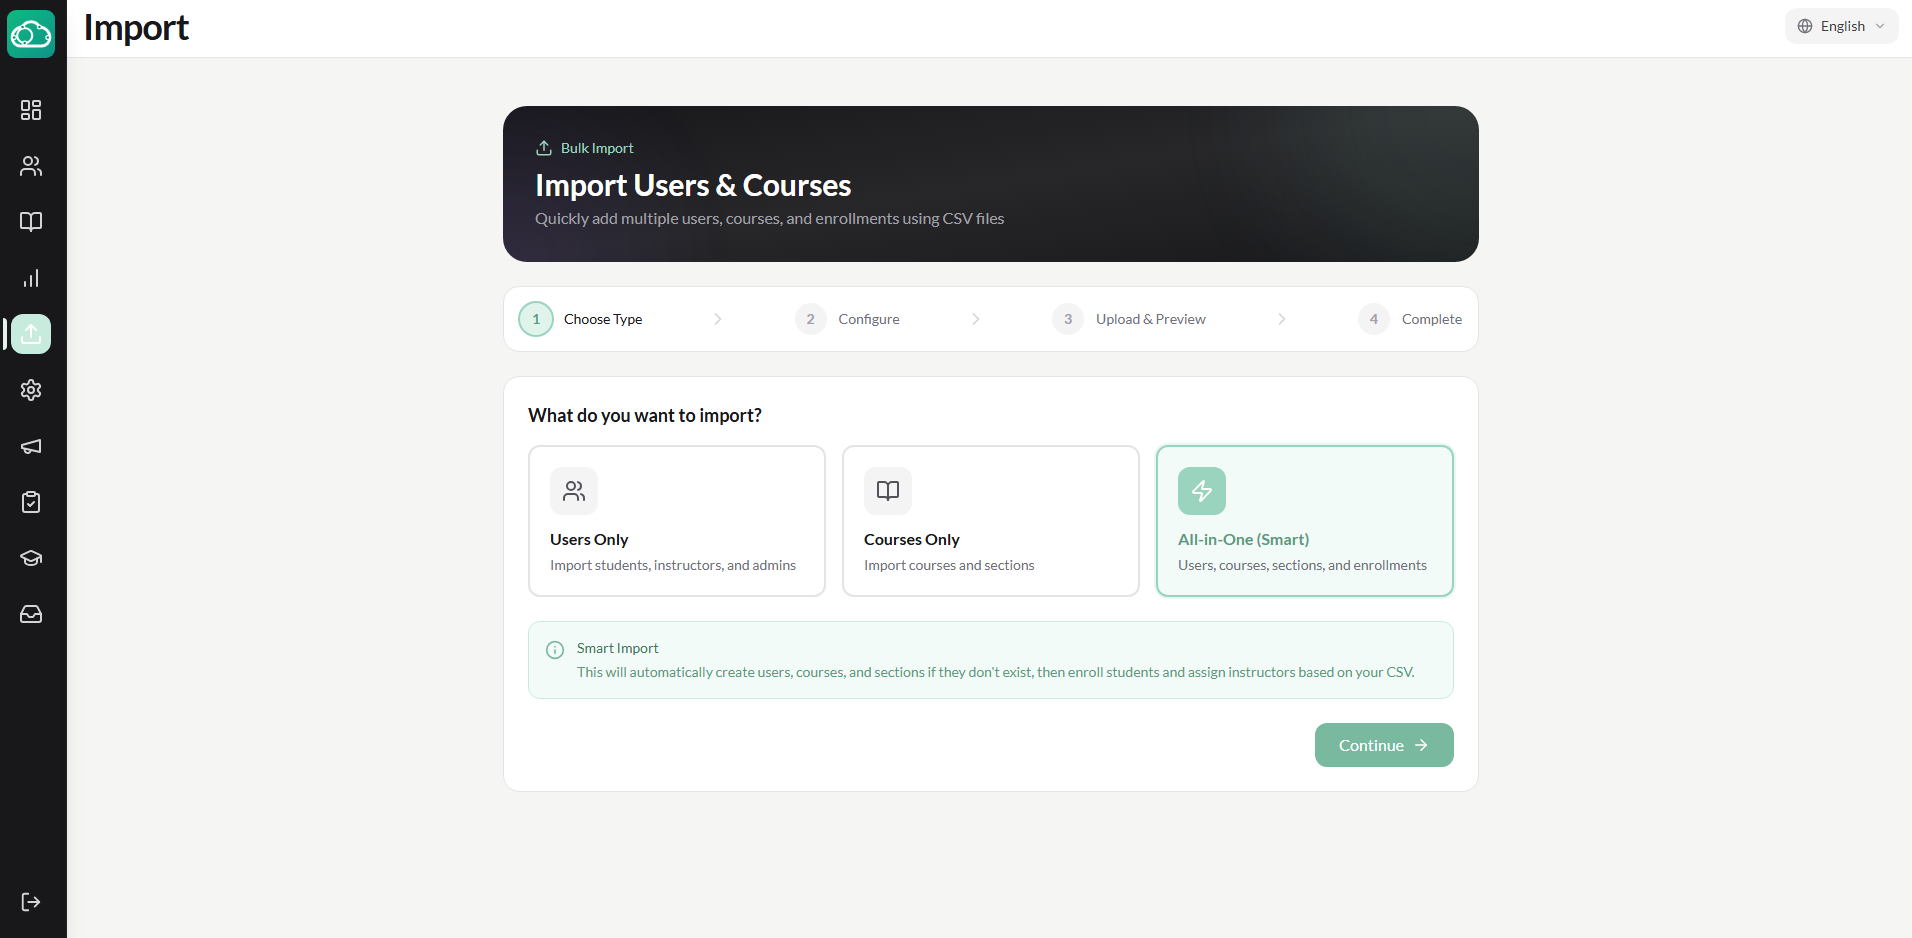
Bulk Enrollment via CSV
When setting up a new term or registering a large number of students at once, bulk enrollment saves significant time. NimbusLearn accepts CSV files to process multiple enrollments in one operation.
- Go to Admin > Enrollments > Bulk Import.
- Download the CSV template by clicking the link provided on the page.
- Open the template in a spreadsheet application (Excel, Google Sheets, etc.) and fill in the required columns: Student ID, Course Code, and Section.
- Save the file as a CSV.
- Back in NimbusLearn, click Upload CSV and select your file.
- The system will validate the data and show a preview — any errors (such as invalid student IDs or missing course codes) will be highlighted in red.
- Review the preview, fix any issues, and click Confirm Import.
Always download a fresh template before each import. The column order and headers must match exactly for the import to succeed. Avoid adding extra columns or changing header names.
Enrolling Entire Sections at Once
If your school has already organized students into class groups or homerooms, you can enroll an entire section into a course in one step.
- Go to Admin > Courses and select the course.
- Click the Enrollments tab, then click Enroll Section.
- Choose the section or class group from the list (for example, "Grade 10 – Section C").
- All students in that section are added to the course at once.
This is the most efficient method for term setup when your student groupings are already defined in the system.
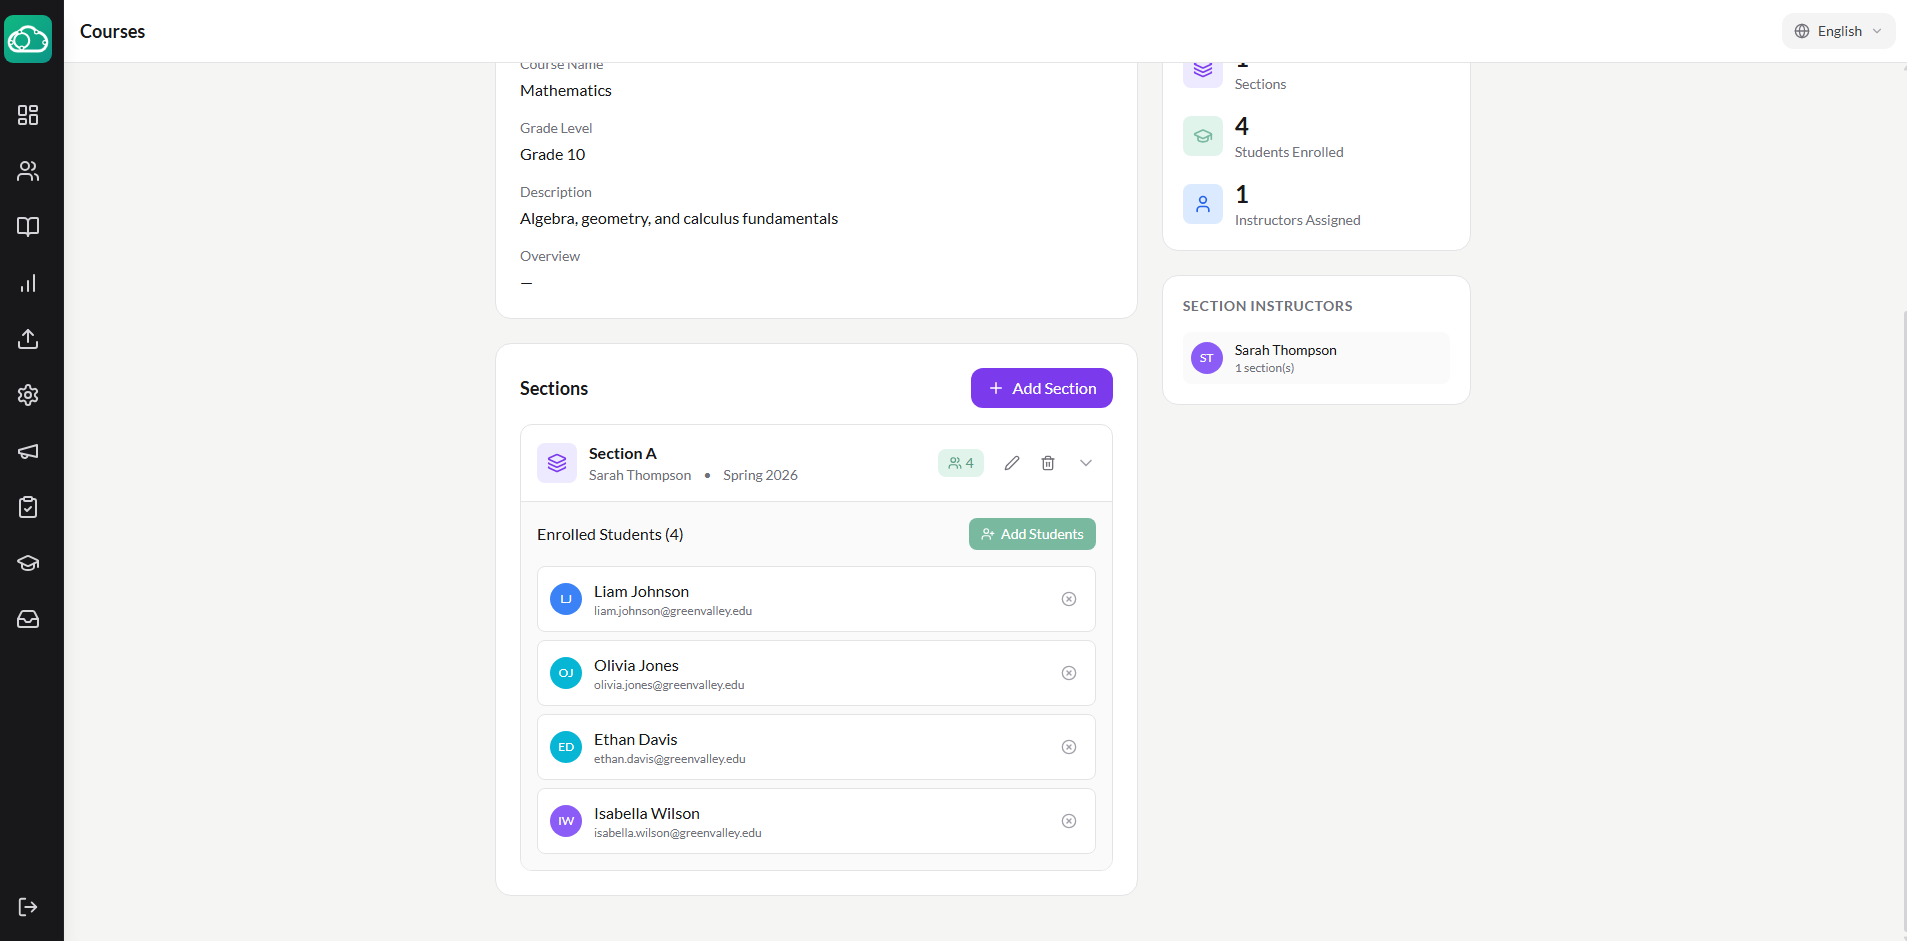
Managing Sections
Sections are managed from the course settings page. Each section has its own roster, instructor assignment, and schedule.
- Create a Section — inside a course, click Sections > Add Section. Give it a name, assign an instructor, and optionally set a schedule (day and period).
- Edit a Section — click the section name to change its details, reassign the instructor, or update the schedule.
- Delete a Section — remove a section if it is no longer needed. Students in the section will be unenrolled from the course. You will be prompted to confirm before deletion.
Deleting a section unenrolls all students in it. If you want to keep the students enrolled but merge them into another section, use the transfer feature instead (see below).
Transferring Students Between Sections
Students sometimes need to move between sections — for example, a schedule change or a class rebalance. NimbusLearn makes this seamless.
- Go to the course's Enrollments tab.
- Find the student you want to transfer and click the three-dot menu next to their name.
- Select Transfer to Section.
- Choose the destination section from the dropdown.
- Click Transfer.
All of the student's existing submissions, grades, and progress are preserved during the transfer. They will simply appear under the new section's roster and be assigned to the new section's instructor.
Removing Students from Courses
If a student needs to be removed from a course — due to a schedule change, withdrawal, or error — you can unenroll them from the enrollments page.
- Go to the course's Enrollments tab.
- Find the student and click the three-dot menu.
- Select Remove from Course.
- Choose whether to keep or delete their submission data. Keeping the data means grades and submissions are archived and can be restored if the student is re-enrolled.
- Confirm the removal.
The student will lose access to the course immediately. If data was preserved, re-enrolling the student later will restore their previous work.
Handling Mid-Year Enrollments
When a new student joins your school mid-year, the enrollment process includes a few extra considerations:
- Create the student account first under Admin > Users > Add Student. Fill in their profile details, assign them to a grade level, and generate their login credentials.
- Enroll them in the appropriate courses using individual or bulk enrollment. Make sure to select the correct sections so they are assigned to the right instructors.
- Communicate with instructors — instructors will see a notification that a new student has been added. They can then decide whether past assignments should be excused or assigned retroactively.
Archiving Enrollments
When a term ends or a student is no longer active in a section, their enrollment can be archived. Archived enrollments preserve all grades and submission data but remove the section from the student's active course list. Admins can archive enrollments individually or in bulk during the promotion process.